


I trust you all had a lovely weekend! We're getting close to actually start constructing our dresses! Are you excited! I am!
Excuse the late post, today really got away from me, and then my computer was freaking out! All is well now, so let's assemble our pattern!
Now that you have printed your pattern what do you do next? Well it's very simple! It's a bit like putting a puzzle together. I'll show you the way I tape these kinds of patterns together, which makes them a bit more stable. As far as printing goes, I printed mine on regular copy paper from Office Max (at work, don't tell...) and it is just as sturdy as regular paper patterns (as opposed to tissue patterns which are what commercial patterns are made from). I've cut this baby out about five times now and it's still going strong. To store it I've bought a small manila envelope and just folded the two pattern pieces as well as the instructions and put them inside. I cut the image from the first page of instructions and glued that to the front. that way it's easy to find and you can keep it nice and neat (unless like some of us you spill coffee on yours...).
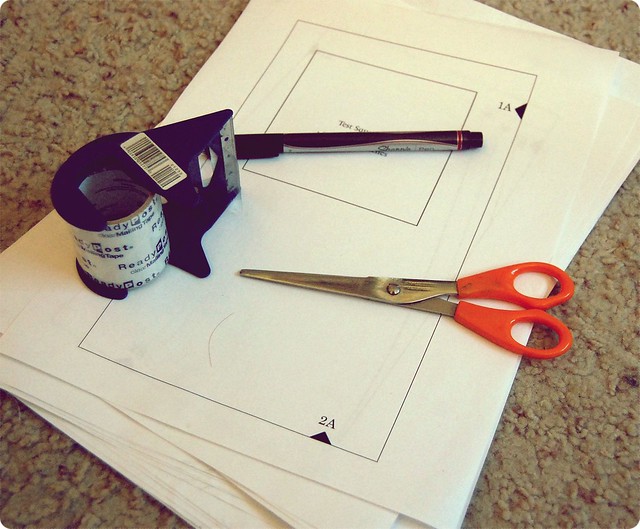
Alright onto the pattern. Here's what you will need:
- Patterns
- Tape
- Scissors
- Coloured marker/sharpie/highlighter
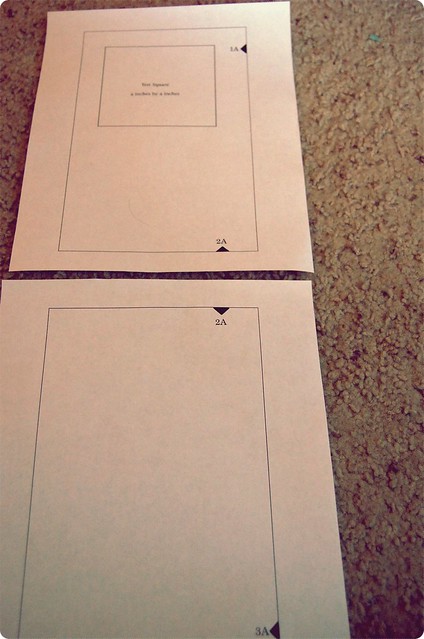
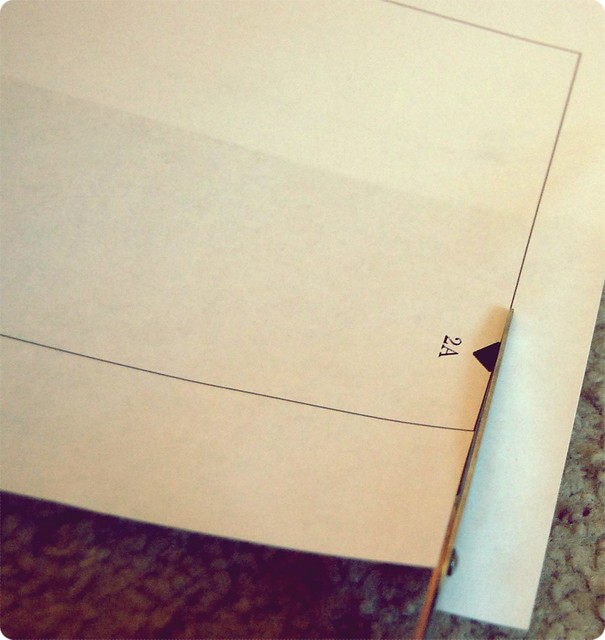
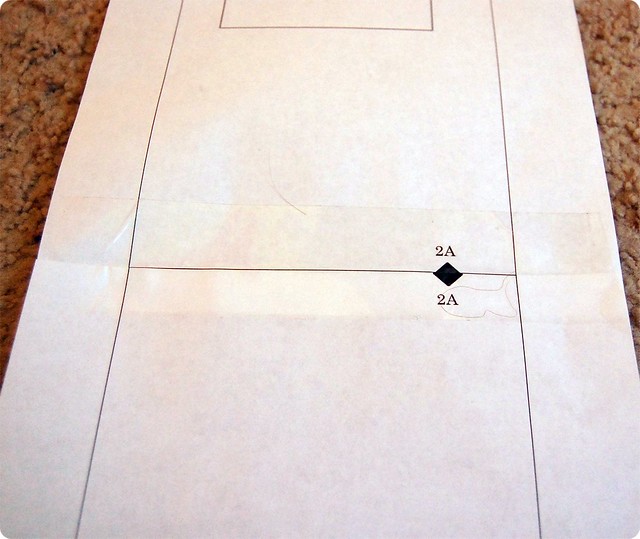
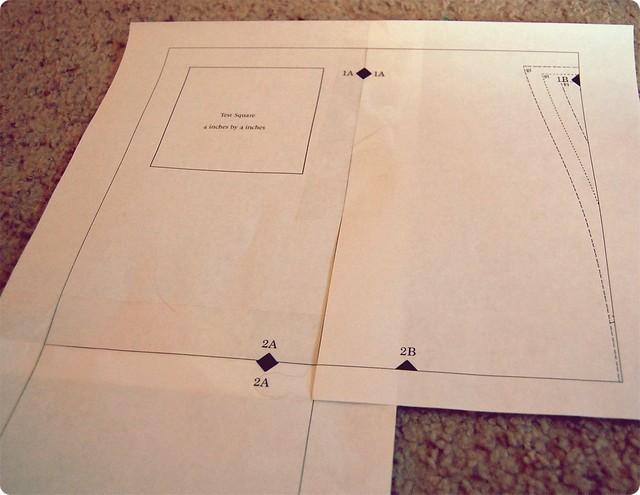
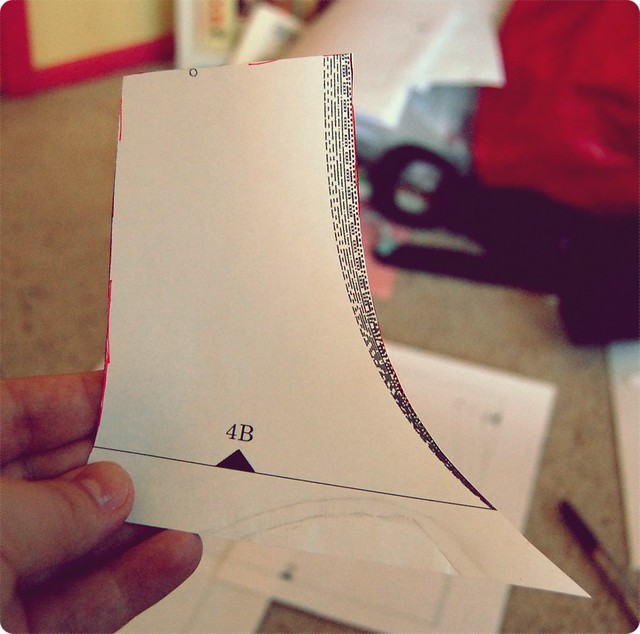
Start with finding the piece with the "Test Square." You'll want to measure this to make sure it is 4x4 inches. If it's not you'll need to print it again at either a smaller or larger scale. It should print out correctly, but just in case! On the side of the Test Square page you'll see a little black notch with "1A" printed next to it. At the bottom of the page you'll find "2A" atop the notch. This is your piecing guide. Find the pieces that correspond with that piece. I put it together in vertical rows so for right now find the piece with "2A" on the top. Begin by cutting along the black line at the page with "2A" on top. Line up the notches and tape together. See how easy that was! Now find the piece with "4A" on the top and repeat: cut along the top black line and tape to the notch. Continue on until you have the full vertical row. Now go back to the top and find the other piece with "1A" on the side. Cut along left side black line, match the notches and tape. With this row you will want to cut along the left side black line as well as the top black line. What you are doing is layering each seam. I doubled taped mine as I went along just to give it a bit more sturdiness. Repeat this process until the whole thing is taped together. Now you've got your pattern!!
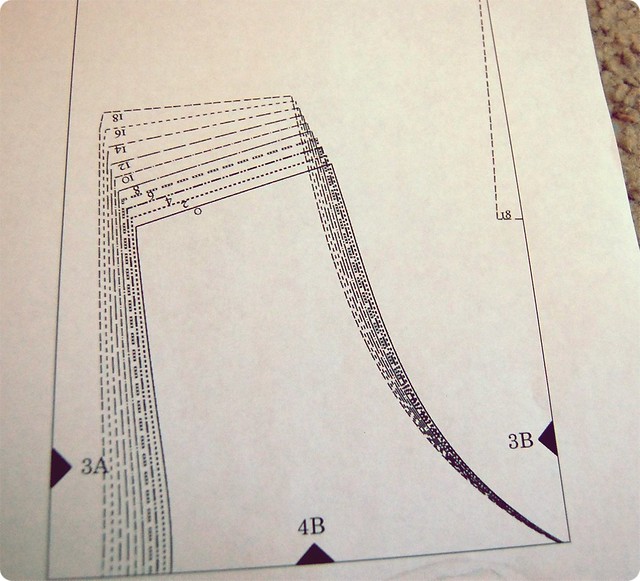
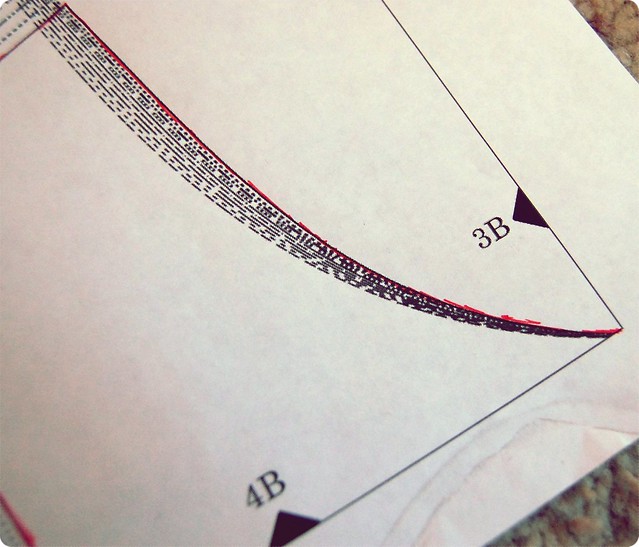
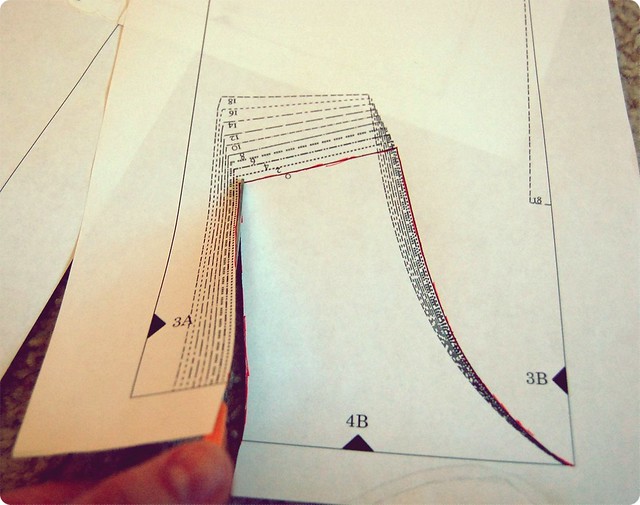
Now you need to cut it out. I find that it is really helpful on multi-sized patterns like this to trace your size's cutting line with a coloured sharpie or highlighter (a crayon will even work!). Sometimes the lines get a bit jumbled any you can get lost in them while cutting. Simply find the size closest to yours and trace the cut line. Now cut out your pattern! When it's all cut out turn the pattern over and tape down all the excess paper. You want the paper for stability but you also want everything to lay flat. This just makes it a bit stronger.
Make sense? If you have any questions don't hesitate to email me, or leave one in the comments. Tonight's the night to wash your fabric because tomorrow we cut! (I should probably pick my fabric!)
No comments:
Post a Comment